
By Rhyan Schicker
When I first heard the description of the vertical mulching process, I must admit I was skeptical.
A few weeks ago we listened to Celia as she described the process; decompressing the soil, collecting dead parts of live bushes, putting them in a hole, filling the hole with rocks and soil and texturing the surrounding soil to naturalize an area in desperate need of rehab.
Of course the process is a bit more detailed but that’s what my initial understanding left me with. In my mind, and most likely the minds of my co-members, we were basically planting dead trees, and I was sure that it would look silly.
I’m happy to say that I was completely wrong.
 We are working on a desert restoration project from now until the end of our term at the Sperry Wash section of Dumont Dunes.

Off highway vehicles (OHVs) have left the landscape riddled with deep incursions. These are as much of an eye sore as they are a destruction to the natural landscape and habitats for lizards, birds, and a long list of desert tolerant plants.
The vertical mulch planting is best understood by trial and error, retrial and success. Last week we learned the steps, and this week we started to hone our skills and create natural looking landscapes from those previously filled with OHV tracks.
I’ll be the first to admit my skills were lacking at the start. The first attempts at creating these shrubs via vertical mulching left me with a Frankenstein type bush – branches flying out in all directions and looking very unnatural. Sometimes we had to just pull the pieces out of the hole and start over.
The beginning stages were easy in concept, yet hard in physical demand.
We attacked the dirt with picks and shovels in the hot sun until all the soil was upturned. Decompressing the soil was creating space with more air and room for plants to grow. Then after hours of rock collecting we spread our rocks out to give natural texturing to the area.
Next we decided where we should “plant” our new shrubs: the most common being cheesebush, desert holly, and creosote. We gathered no more than 10% off each existing live bush to transfer into our newly dug holes.
A Completed Restoration Site
It takes way more pieces than you’d expect to create a new shrub! After all the shrubs were in place we would pack them down. A good pull test ensured stability. Lastly we made small divots in the dirt to fill with seeds. The brush from our new shrubs provides shade and good habitat for the seeds to grow and provide future habitat.
Stepping back and viewing what we had accomplished, I was shocked to see how natural the area looked. No incursion lingered in that area. It look as if the shrubs were alive, some holding a bit of green, as dead creosote is known to do. The most enjoyable part was watching a hummingbird fly from bush to bush inspecting the new areas, previously barren. Besides the hummer, the lizards, scorpions, and many others now had new rocks and bushes to dig themselves homes beneath.
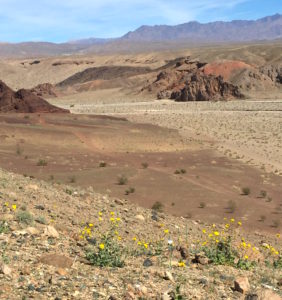
The Drive to Access Worksites
This work has been proven over time to be the most effective way to keep OHV users out of an area.
By erasing incursions we also remove the curiosity of riders who would normally stay on the approved trails. No longer do they look off into the distance, view the tracks and think, “Hey-looks like a trail over there,” and further impact the area. By setting up a natural scene with bushes and reworked soils, void of OHV tracks, there is a lessened chance that the next rider will drive through.
I’m really proud of the work our team put in at the site, and one other site since. While the process itself can be physically draining, stepping back afterwards gives us a feeling of satisfaction over the viewable progress. I know we all look forward to getting rid of more incursions and creating new habitat and continue enhancing our vertical mulching skills!